```html
Oh, let me tell ya, fixing that evaporator coil leak ain't a simple job, but I’ll try to make it as plain as a day in summer. Now, when that air conditioner starts leaking and not blowing cool air, most folks don’t know what to do. But don’t worry, I'll lay it out step by step so even folks with not much know-how can understand. You’ll need patience, some basic tools, and a little elbow grease. Let’s get started.
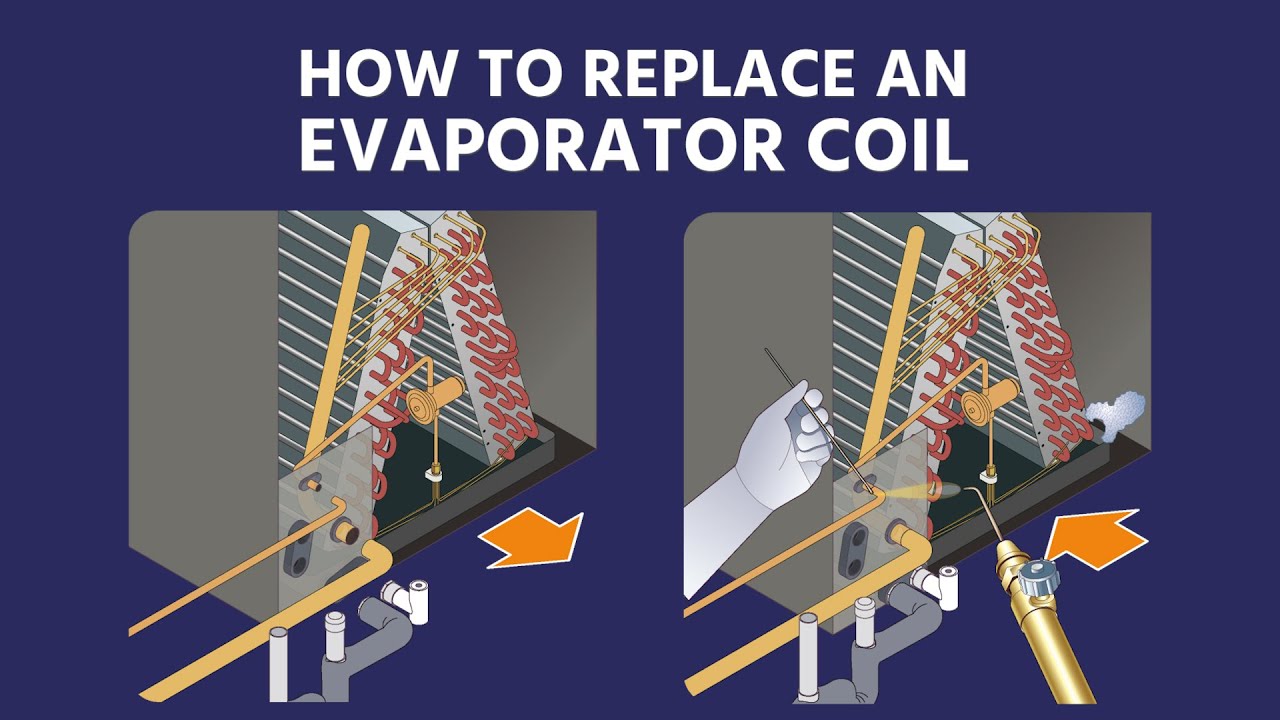
1. Spotting the Leak
First things first, you gotta figure out where the leak is. Now, you can't just guess; you need to see it. Start by turning off the air conditioner and unplugging it from the power. Safety first, mind you! Once it’s safe, open up that unit and take a close look at the evaporator coil. It’s that bunch of thin metal tubes inside that helps keep the air cold. If you see any wet spots or rust, that might be where it’s leaking from.
2. Cleaning the Area
Before ya do anything, clean that coil up. Dust and dirt can get all over it like a thick coat of mud on boots. Take a soft brush and gently scrub it. Don’t go jabbing at it like poking a cow; be gentle, or you might make things worse.
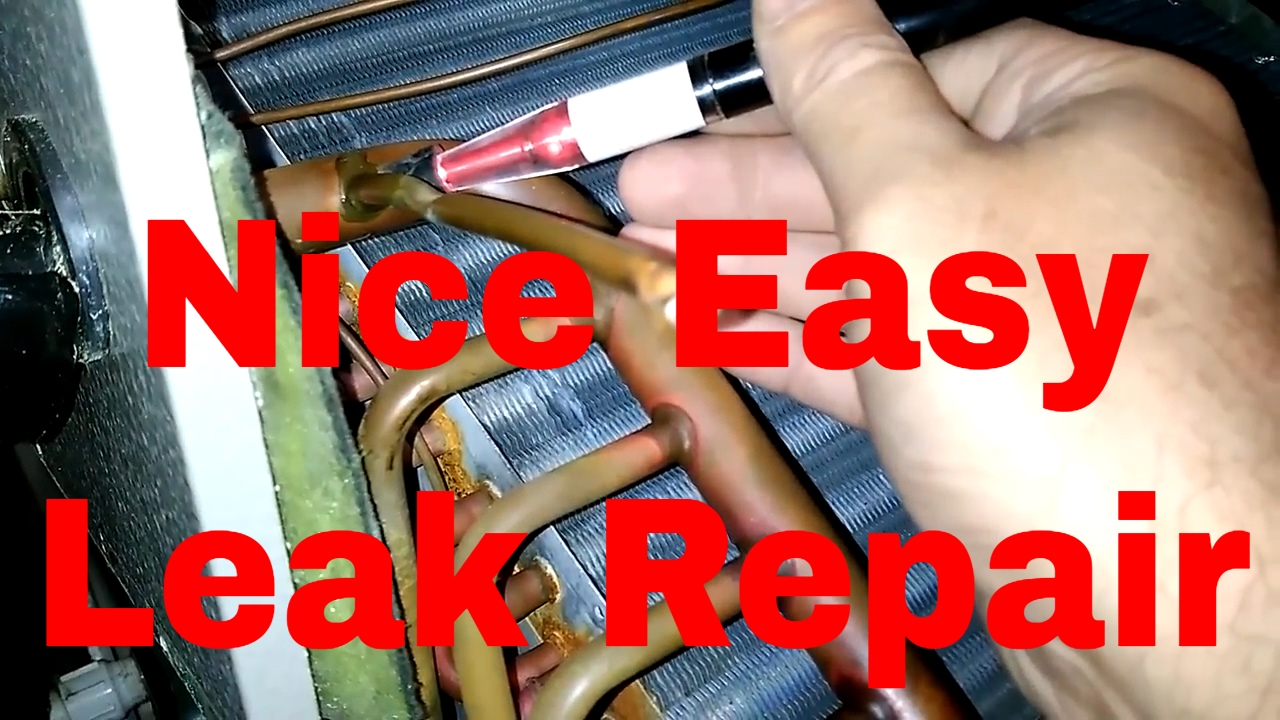
3. Using Leak Sealant
Now, here comes the important part. If the leak ain’t too big, you might fix it with a sealant. You can get a product like A/C EasySeal from the store. It’s a handy little thing that works kind of like a patch on a bike tire but for your air conditioner. Read the directions on the package, but here’s the basic idea:
- Make sure the system is off and drained of any pressure.
- Hook the sealant up to the right valve (usually the low-pressure side).
- Let it flow in as you restart the system for a bit to let it circulate.
That sealant finds those tiny holes and seals 'em up like magic. But, I tell ya, this won’t work if you got a big ol’ leak or too many of 'em. Then you’re looking at a bigger repair, maybe replacing the coil altogether.
4. When It’s Time to Call a Pro
If your sealant trick doesn’t do the job or the coil looks more worn out than old farm tools, you might need to call in a professional. Replacing the whole coil or even the air handler can be pricey, but sometimes it’s the only way. Don’t go wrestling with things you don’t understand too well, or you could end up with a busted system and a bigger bill.
5. Tips for Preventing Future Leaks
Now, you know what they say – an ounce of prevention is worth a pound of cure. So, here’s what ya can do to stop these leaks before they start:
- Keep indoor humidity low: High humidity can make them coils rust faster than a nail left in the rain.
- Reduce VOCs in the air: That’s fancy talk for chemicals in the air, like from cleaning supplies and paints. Those can break down the coil over time.
Keep things clean and serviced, and your unit should stay happy for longer.
Conclusion
So, there ya have it, fixing an evaporator coil leak isn’t for the faint of heart, but with a little know-how and the right stuff, it can be done. Just remember, don’t get too brave if things look too complicated; sometimes calling a pro is the best choice to keep your cool.
Tags: [HVAC repair, evaporator coil leak, air conditioner maintenance, DIY air conditioner fix, home cooling tips]